Dec 24, 2014

Last Minute Tag Idea and a Christmas Card using Silly Santa by Lia Stampz

Well things have been a little hectic around here to say the least but isn't that always the case when we are days away from Christmas?!!  And now here we are on Christmas eve and I still have two things I wanted to show you.. So we are going to jam them all into one post.

You might remember my tags I made last year with the kids photo's.  I used my old business cards to make gift tags.  You can find them HERE.  Well my granddaughter asked if I would have pictures on my gifts again this year.  How can I tell her no??  I didn't have any of the business cards left over so in a panic I ran to Walmart, which is really my only close option.  I found some little wooden circles or discs.  There were 6 in a package and I think mine were about 3" in size.


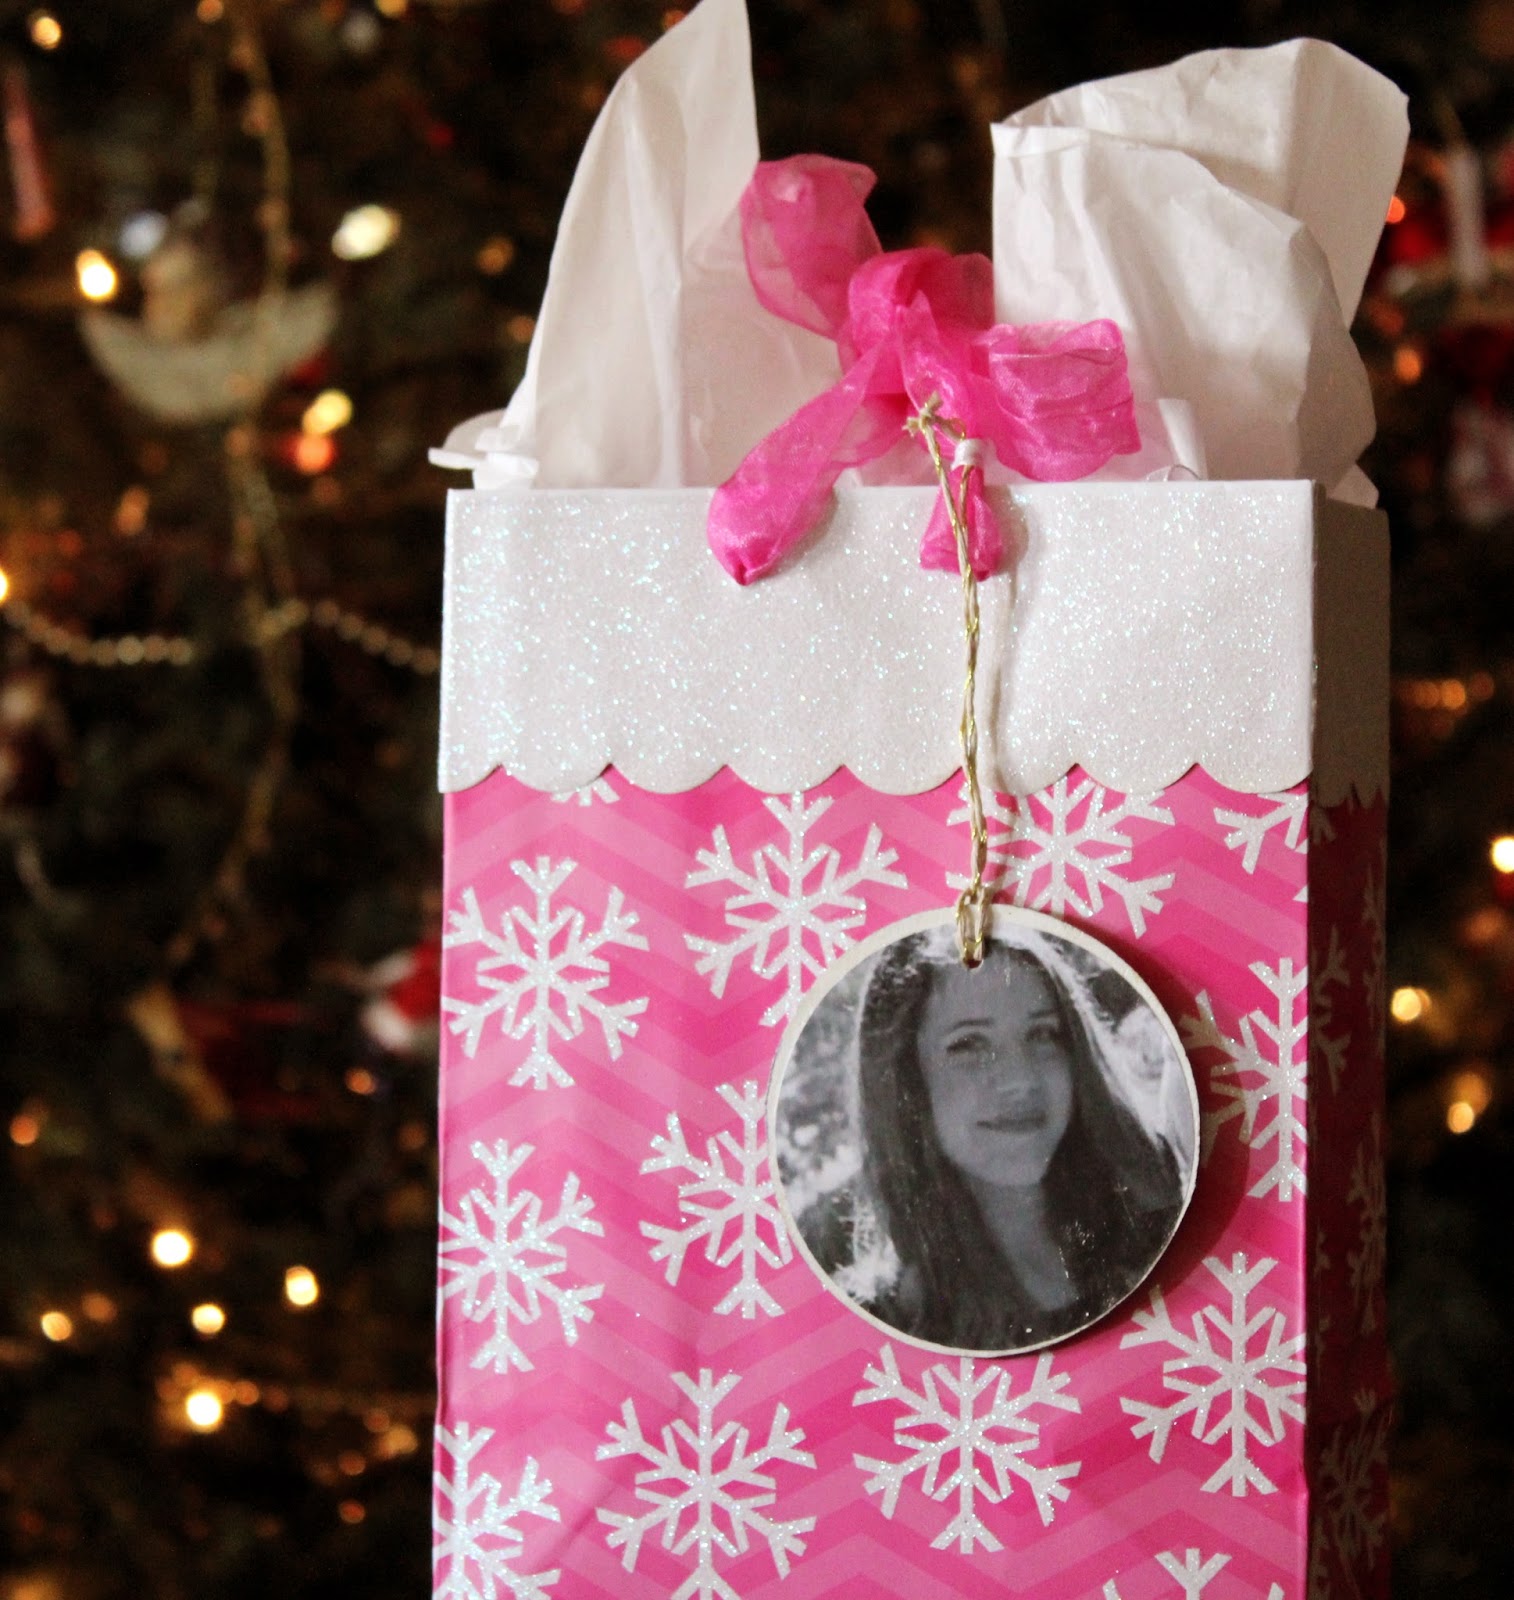
I thought they turned out pretty cute!  Same basic process as was used on the business cards but the step by step on how I did it is below.

1.  Drill a small hole in the wooden disc.  You will need to use a piece of sand paper to smooth over the hole where you drill.
2. This step can be skipped but I was wanting a more finished look so I dry brushed a little paint on the back to give the wood a sort of antiqued look. (sorry no picture).  I also used a gold pen to finish the little side of the disc. I just ran my pen around the edge so it didn't look like bare wood.
3.  Print your picture or image in a size to fit your disc.  I used plain copy or printer paper.
4.  Cut your image out in a circle shape as close as possible to the size of your disc.  I used my Silhouette to do this but you could use any circle cutter or you could also use a glass and trace around it and then cut it out by hand.
5. Lay your photo on top of the disc. Find the hole in your wooden disc and mark that spot on your photo.  Next use a hole punch and punch a small hole out of your photo where you marked.
6. Paint a thin coat of Mod Podge (I used Matte) on the disc.
7. Place your photo on the disc and make sure you line the holes up.
8. Smooth the photo out, trying to remove all air bubbles.  I would let this dry for a few minutes.
9. Brush a thin coat of Mod Podge over the top of your image.  Let it dry.
10. Brush a second coat of Mod Podge over your image.
11. Once dry you can put a string through the hole and hang it on you package.I found my string at Walmart too. I actually found mine in the section with the beads. It had a pretty glittery gold string running through it.

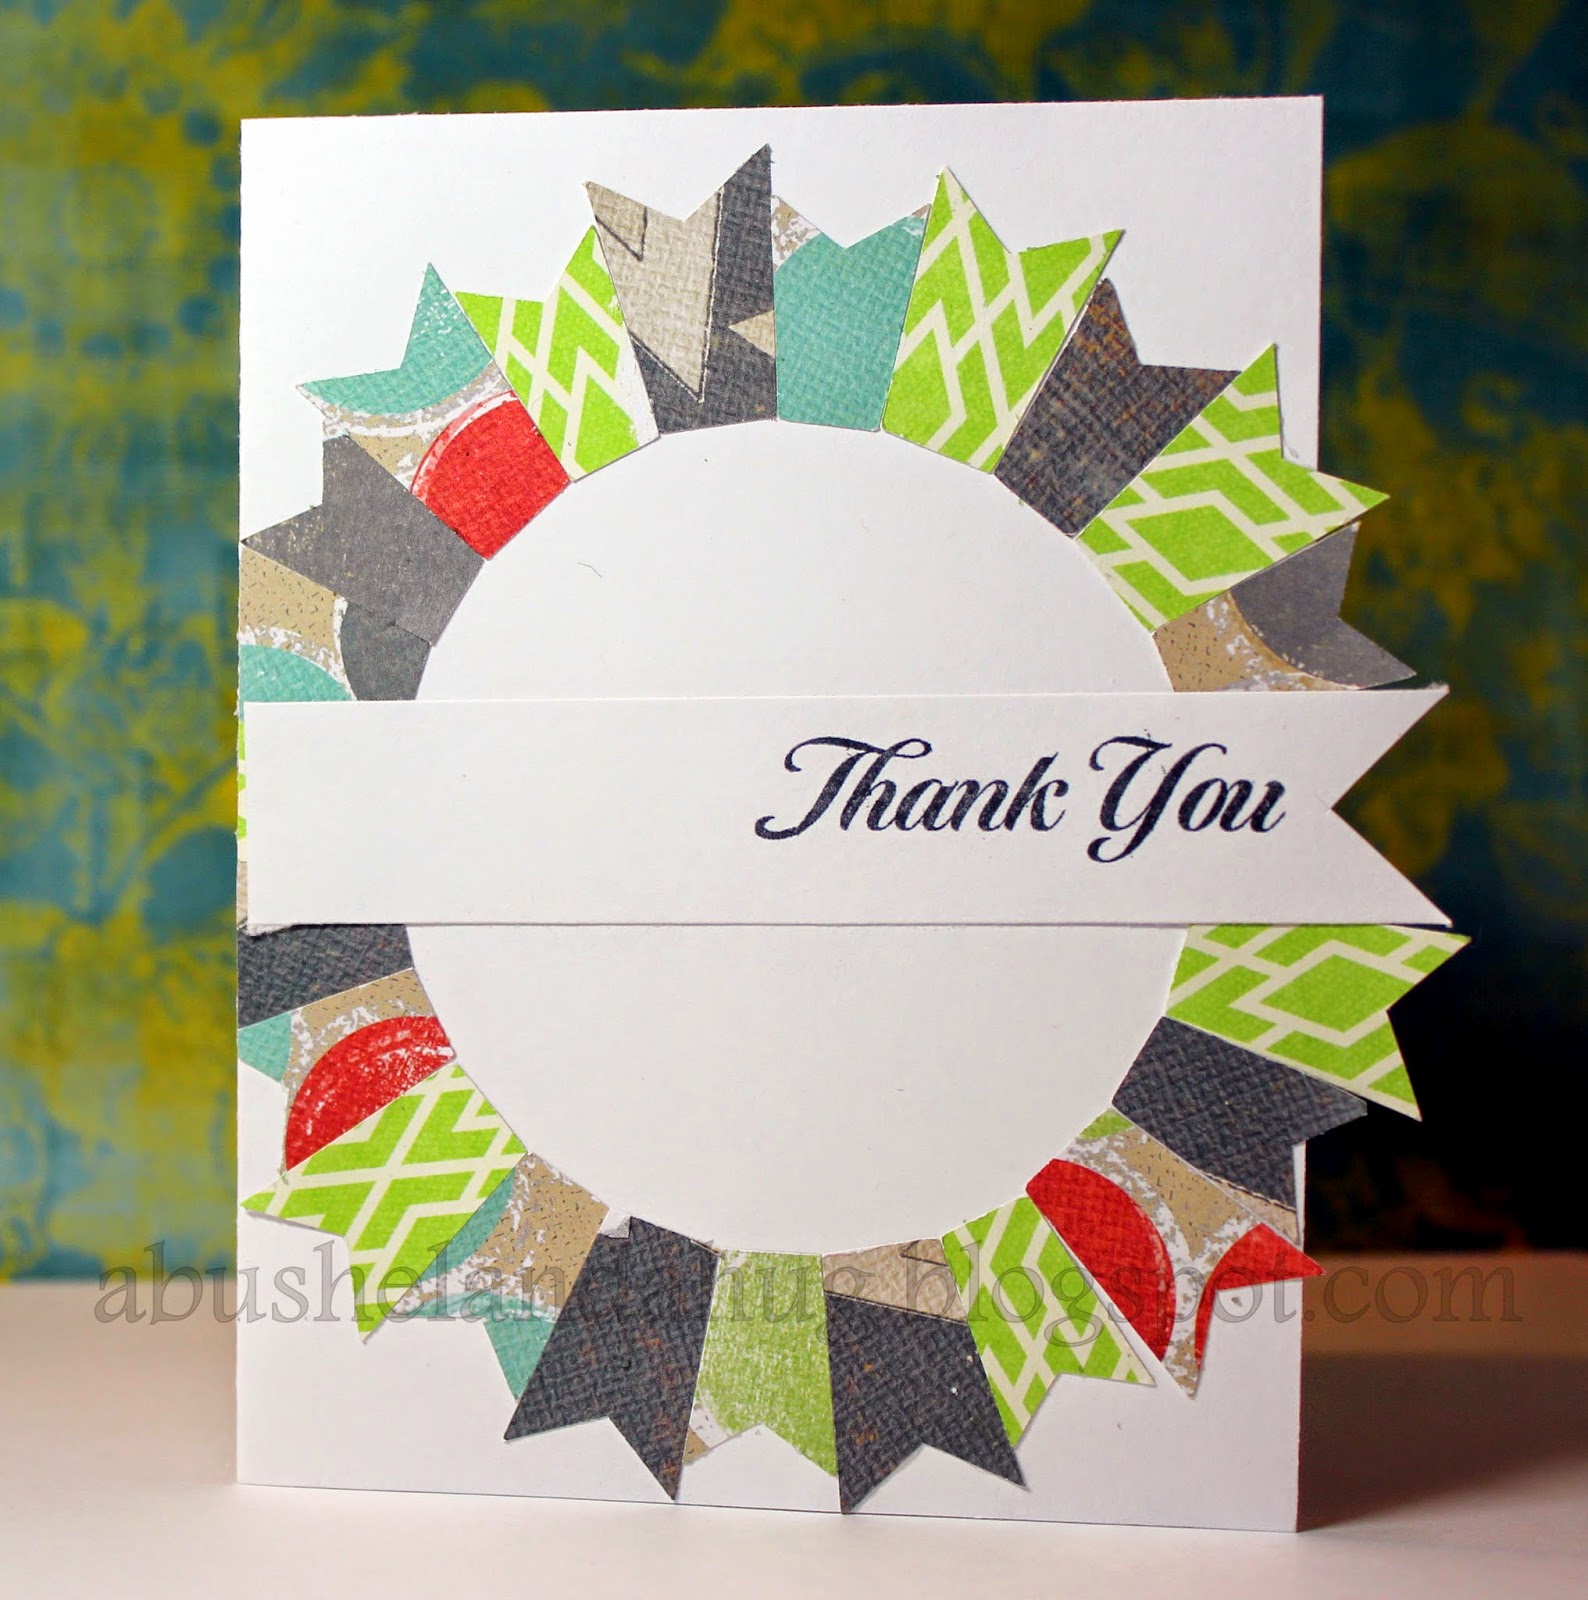
On to my card.  I recently won the cutest stamp set from Lia Stampz.  Wow does she have some cute digital images!  I wanted to make my cards using this set but.... well I didn't find time to get cards made.  I did however make one card using the set just so you can see how cute they are.  Click on her link above to check them out.
Thank you to Lia Stampz for the opportunity to win this adorable set.  I wish I would have had more time to play with it.

I
these are the colors I used for my image above.

Have a Merry Christmas!


Dec 18, 2014

A Silhouette Project- Thank You Card

This is a pretty simple project but I thought I would share the card because it was a way for me to use up some of my scrap paper.  I am ALWAYS trying to use of some of my stash.  Why do I have so much!! Lol.
I created this card using my Silhouette.  I was drawn to the cut file because it reminds me of a quilt pattern.  I just used some papers that coordinated in color and then cut them out on my machine. Once I got the colored flags cut out I put them through my Xyron sticker maker and then just applied them to the card. 
For the sentiment I cut a strip of card stock the the size I needed.  I wanted the sentiment to be on a flag as well so I traced the "V" shape off of one of the pieces I had cut out with the Silhouette and then just used my scissors to cut it out.  I stamped "Thank You" on on the strip and then applied it to the card.

I thought it turned out pretty darn cute and I used up a couple of my four billion pieces of scrap paper to boot.

Have a great day!


Dec 10, 2014

Make Someone's Day Special

A Simple note can mean so much. It serves as a reminder that someone loves you and that they took time out of their day to let you know it.  My Granddaughter Emma gave me this one the other day.  She didn't make a big production out of it- She just wrote it down and handed it to me, "here you go" she said, "this one is for you".   It really wasn't a big deal to her but it melted my heart.  I hung it on my bulletin board and every time I walk by I feel such a joy in my heart.

She has a thing for Post It Notes or as she calls them  "sticky notes".
 When Grandpa came across a package of them the other day, he gave them to her.   She immediately sat down and wrote him a quick little note.....
how cute does it get?! 


 Do you want to make someone's day special? Place a note in their lunch box, leave a note on the counter for them to see after you've left, or write a message on the mirror in lipstick  for them to find in the morning. Trust me, even if you can't see it on their face, they are smiling on the inside.

I think that the old fashioned act of writing a note and sending it through the mail can have the same effect.  I recently created some thank you notes with some patterned paper and a printer.  no tools required other than some scissors.

I think they are simple and elegant

and the important thing, they were sent with love.


I hope you get a special note today in your mailbox, your lunch box or even on a stigy note!